😁Bất ngờ về sử dụng Window History full 2, window.history.scrollRestoration,history.replaceState(ok)
https://openplanning.net/12403/javascript-history-api
<!DOCTYPE html>
<html>
  <head>
    <meta charset="UTF-8" />
    <meta name="viewport" content="width=device-width" />
    <title>Demo Scroll Restoration</title>
    <link rel="stylesheet" href="/index.css" type="text/css" />
  </head>
  <body>
    <main>
      <h1>Demo Scroll Restoration</h1>
      <p>
        Scroll restoration allows one to change the scroll
        position of a dynamic element on the page and then
        refresh and have the scroll position return to where
        it had been before the refresh.
      </p>
      <ol>
        <li>Scroll the nav</li>
        <li>Observe the scroll position</li>
        <li>Refresh</li>
        <li>Observe the same scroll position</li>
      </ol>
    </main>
    <script src="/index.js" charset="utf-8"></script>
  </body>
</html>


1- window.history

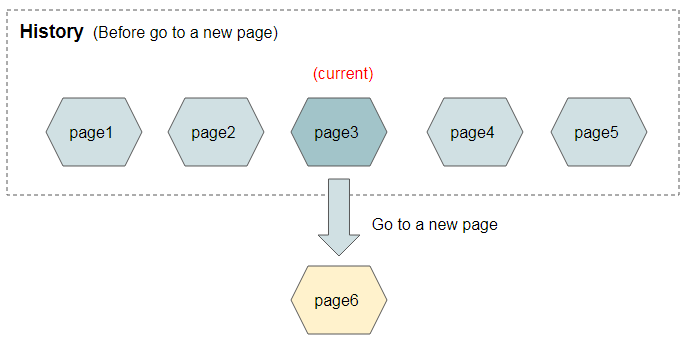
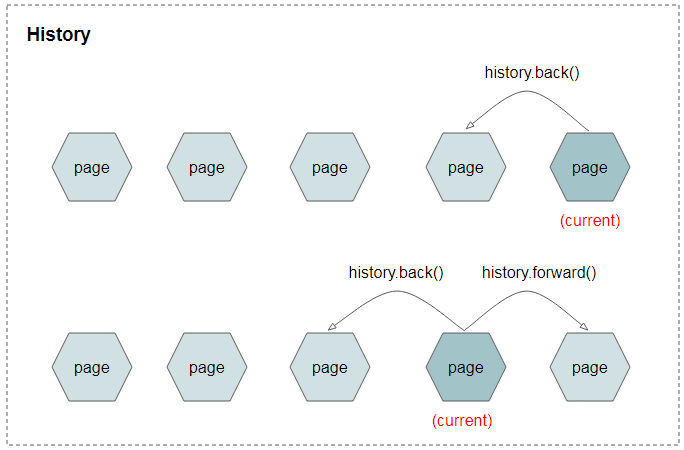

2- Properties

3- Methods
4- history.pushState()

5- history.replaceState()
6- Sự kiện popstate
PreviousBất ngờ về sử dụng Window History full 1 (ok)NextworkingHoursBetweenTimes, tính giờ làm việc, giờ làm thêm (ok)
Last updated