# \[Fullstack] Xây dựng forum bằng GraphQL, React, Apollo và Prisma - Part 3 (Backend - Simple Mutation
## \[Fullstack] Xây dựng forum bằng GraphQL, React, Apollo và Prisma - Part 3 (Backend - Simple Mutation)
Bài đăng này đã không được cập nhật trong 5 năm
Hello mọi người! Tiếp tục với series xây dựng forum bằng GraphQL, React, Apollo và Prisma.
Các bạn có thể xem phần trước ở [đây](https://viblo.asia/p/fullstack-xay-dung-forum-bang-graphql-react-apollo-va-prisma-part-2-backend-project-setup-and-graphql-query-ByEZkv82KQ0). Ở phần này, mình sẽ tạo một số Mutation cơ bản như CREATE, UPDATE và DELETE cho GraphQL API.
### Định nghĩa Mutation
Cũng giống như Query mình đã nói ở phần trước. Đối với `Mutation` chúng ta vẫn cần định nghĩa cho nó trong `typeDefs` .
Trong `src/index.js`:
```none
const typeDefs = `
type Query {
info: String!
}
type Mutation {
createNewPost(title: String!, content: String!): Post!
}
type Post {
id: ID!
title: String!
content: String!
}
`;
```
Ở đây đơn giản là mình tạo 1 `Mutation` là `createNewPost` và schema `Post`. `createNewPost` mutation sẽ nhận 2 params `title` và `content` (required) và dữ liệu trả về sau khi create Post chính là 1 object có kiểu dữ liệu là `Post`.
### Khởi tạo resolver Function
Sau khi đã định nghĩa `Mutation`, chúng ta sẽ khởi tạo `resolver` cho `Mutation` trên.
Trong `src/index.js`
```none
// 1
let posts = [
{
id: 'post1',
title: 'Part3: Single Mutation GraphQL API',
content: 'Simple create mutation for GraphQL ...'
}
];
// 2
let postId = posts.length + 1;
const resolvers = {
Query: {
info: () => 'Building forum with GraphQL and React',
posts: () => posts,
},
// 3
Mutation: {
createNewPost: (parent, args) => {
const newPost = {
id: `post${postId++}`,
title: args.title,
content: args.content,
};
posts.push(newPost);
return newPost
}
}
};
```
* `posts`: Ở đây vì chưa có Database nên mình tạm thời khởi tạo dữ liệu mẫu. Về khởi tạo Database, mình sẽ giới thiệu ở phần sau. Mục tiệu của phần này là hiểu được cách Mutation hoạt động (vậy là đủ rồi ).
* `postId`: Tạo dynamic post ID dựa vào length của `posts`
* `Mutation`: Là một object bao gồm tất cả những thao tác cập nhật hoặc thay đổi dữ liệu (**CREATE**, **UPDATE**, **DELETE**)
* `createNewPost`: Mutation để tạo mới `Post` (lưu ý cách đặt tên: Tên function trong này phải trùng với tên `Mutation` trong schema mà chúng ta đã khởi tạo ở trên. Không là khi chạy sẽ báo lỗi.
```none
type Mutation {
createNewPost(title: String!, content: String!): Post!
}
```
Function `createNewPost` khởi tạo `Post` sau đó trả về chính `newPost` vừa tạo.
### Testing Mutation
Khởi động lại server, save change sau đó run command bên dưới. Trong root folder:
```none
node src/index.js
```
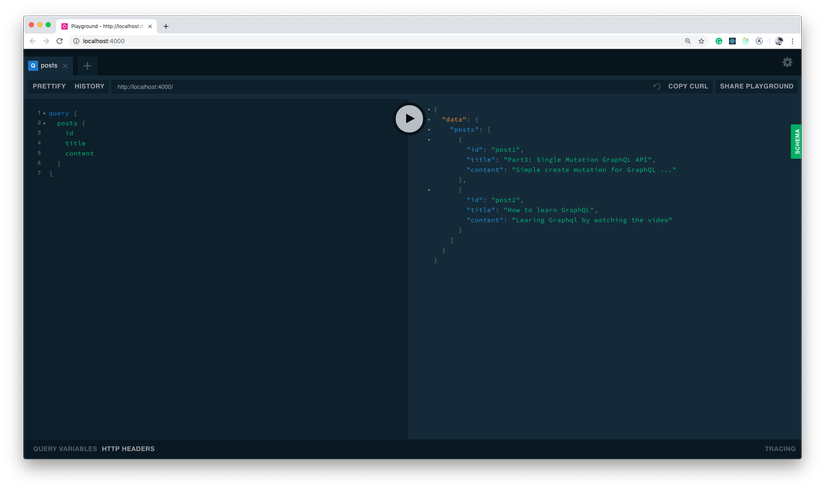
Truy cập vào `http://localhost:4000`, gửi `Mutation` bằng Playground.
```none
mutation {
createNewPost(
title: "How to learn GraphQL"
content: "Learing Graphql by watching the video"
) {
id
}
}
```
Server response:
```none
{
"data": {
"createNewPost": {
"id": "post2"
}
}
}
```
Với mỗi mutation chúng ta gửi, `postId` sẽ tự động tăng lên, `post2`, `post3`, ... Để kiểm tra mutation chúng ta vừa tạo có thực sự hoạt động hay công, chúng ta sẽ gửi query lấy tất cả các `posts`
### Update, Delete Mutation
Tương tự với **Create** thì chúng ta cũng có thể **Update** hoặc **Delete** với Mutation.
Trước khi khởi tạo Mutation cho Update và Delete thì mình muốn refactor lại một chút. Hiện tại `typeDefs` của chúng ta đang phình ra khá to nên mình muốn move object này ra một file riêng có định dạng là `schema.graphql`
Tại root folder, chạy command:
```none
touch src/schema.graphql
```
Copy toàn bộ code trong object `typeDefs` vào file `schema.graphql` mới vừa tạo và khởi tạo thêm 2 `Mutation` mới là `updatePost` và `deletePost`. Tiếp theo mọi người hãy xoá biến `typeDefs` đi.
Khi này file `schema.graphql` của chúng ta sẽ như sau:
```none
type Query {
info: String!
# Fetch all posts
posts: [Post!]!
}
type Mutation {
# Create new post
createNewPost(title: String!, content: String!): Post!
# Update post
updatePost(id: ID!, title: String, content: String): Post
# Delete post
deletePost(id: ID!): Post
}
# Define post schema
type Post {
id: ID!
title: String!
content: String!
}
```
Điều tuyệt vời của `GraphQLServer` là `typeDefs` có thể là string hoặc tham chiếu đến 1 file khác 
Quay trởi lại `index.js`, chúng ta tham chiếu file `schema.graphql` vừa tạo trong object `server`:
```none
const server = new GraphQLServer({
typeDefs: './src/schema.graphql',
resolvers,
});
```
Chúng ta đã có **Update**, **Delete** Mutation definition, tiếp theo là khởi tạo resolver cho nó:
Trong `index.js`, add thêm 2 function này vào `resolvers` object
```none
updatePost: (parent, args) => {
// find the index post by id
const currentIndex = posts.findIndex(post => post.id === args.id);
// updated object (mutate way)
posts[currentIndex].title = args.title;
posts[currentIndex].content = args.content;
return posts[currentIndex];
},
deletePost: (parent, args) => {
// find the index post by id
const currentIndex = posts.findIndex(post => post.id === args.id);
// delete post
const postDeleted = posts[currentIndex];
posts.splice(currentIndex, 1);
// return post just created.
return postDeleted;
}
```
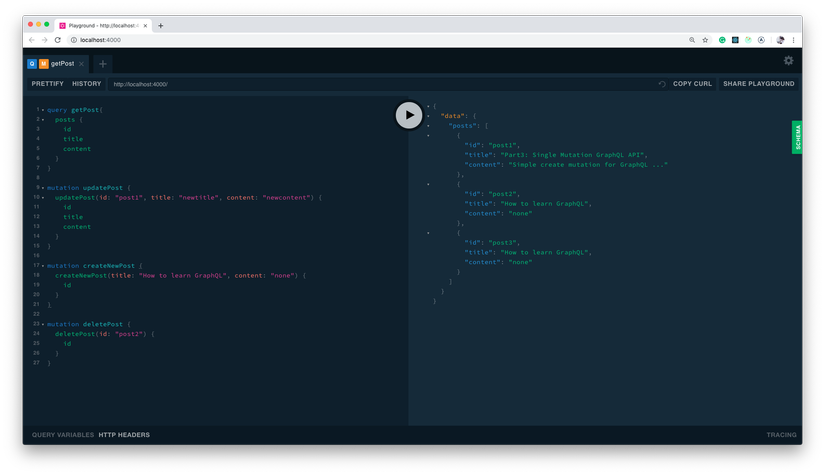
Restart lại server sau đó test thử trong Playground
### Tổng kết
Vậy là ở phần này chúng ta đã cùng nhau tạo một số Mutation cơ bản cho GraphQL API. Ở phần tiếp theo, mình sẽ design, thiết kế DB và liên kết chúng với Prisma server.
Cảm ơn các bạn đã đọc bài !
*Happy Coding!!*